Preface: This is the first of a two-part series on Deploying Your NodeJS App on Azure. In this guide, you will learn about the painless way to make use of the Azure App Service (formerly, Microsoft Azure Web Sites) which provides support for popular frameworks like .NET, .NET Core, Java, Node.js, Python, PHP and Ruby.
Azure App Service offers auto-scaling and load balancing, supports both Windows and Linux, and enables automated deployments from GitHub, Azure DevOps, or any Git repo (locally and online). You’ll learn how to use the App Service in this guide.
Going forward, it is worthy to note that this guide would be covered in four key steps;
- Create a Web App Service
- Code a NodeJS app
- Deploy the NodeJS app on the created App Service
- Testing!
The first of these four steps is covered in this part, while the other three steps are covered in the second part.
First off: Create a Web App Service
Quick note, we would be making use of the Azure Portal to deploy our NodeJS web app.
As a very first step, be sure to create an Azure account here - if you do not have an Azure account already - and sign in to your Azure Portal.
Then, create a resource — this is in the top corner on the left pane of your dashboard.
 <figcaption>Click on “Create a resource” to create a new resource to hold the Web App Service</figcaption>
 <figcaption>Click on “Web App” to get the Web App Service from the Azure Marketplace to your new resource</figcaption>
The Azure marketplace is the destination for all softwares required to work with Microsoft Azure. On the next page, there would be some details to provide so that Azure knows exactly how to describe and provision your web app. These details are explained below:
Subscription: You need to tell azure which of your subscriptions to attach to your billing(s) for this web app. I’m on Visual Studio Enterprise, the reason I’m not selecting “Pay-As-You-Go Dev/Test” for this guide - you should, if you’re not on an enterprise plan.
Resource group: This is like a container, it is needed in putting together - identical items/resources gotten from the Azure Marketplace in the same container or location, for easier location of these resources. These items or resources could be web apps, database add-ons, API endpoints and Azure cognitive services. Create a new resource group here to hold the Web App resource to be created - as shown below, I named the one used for this guide: NodeAppService.
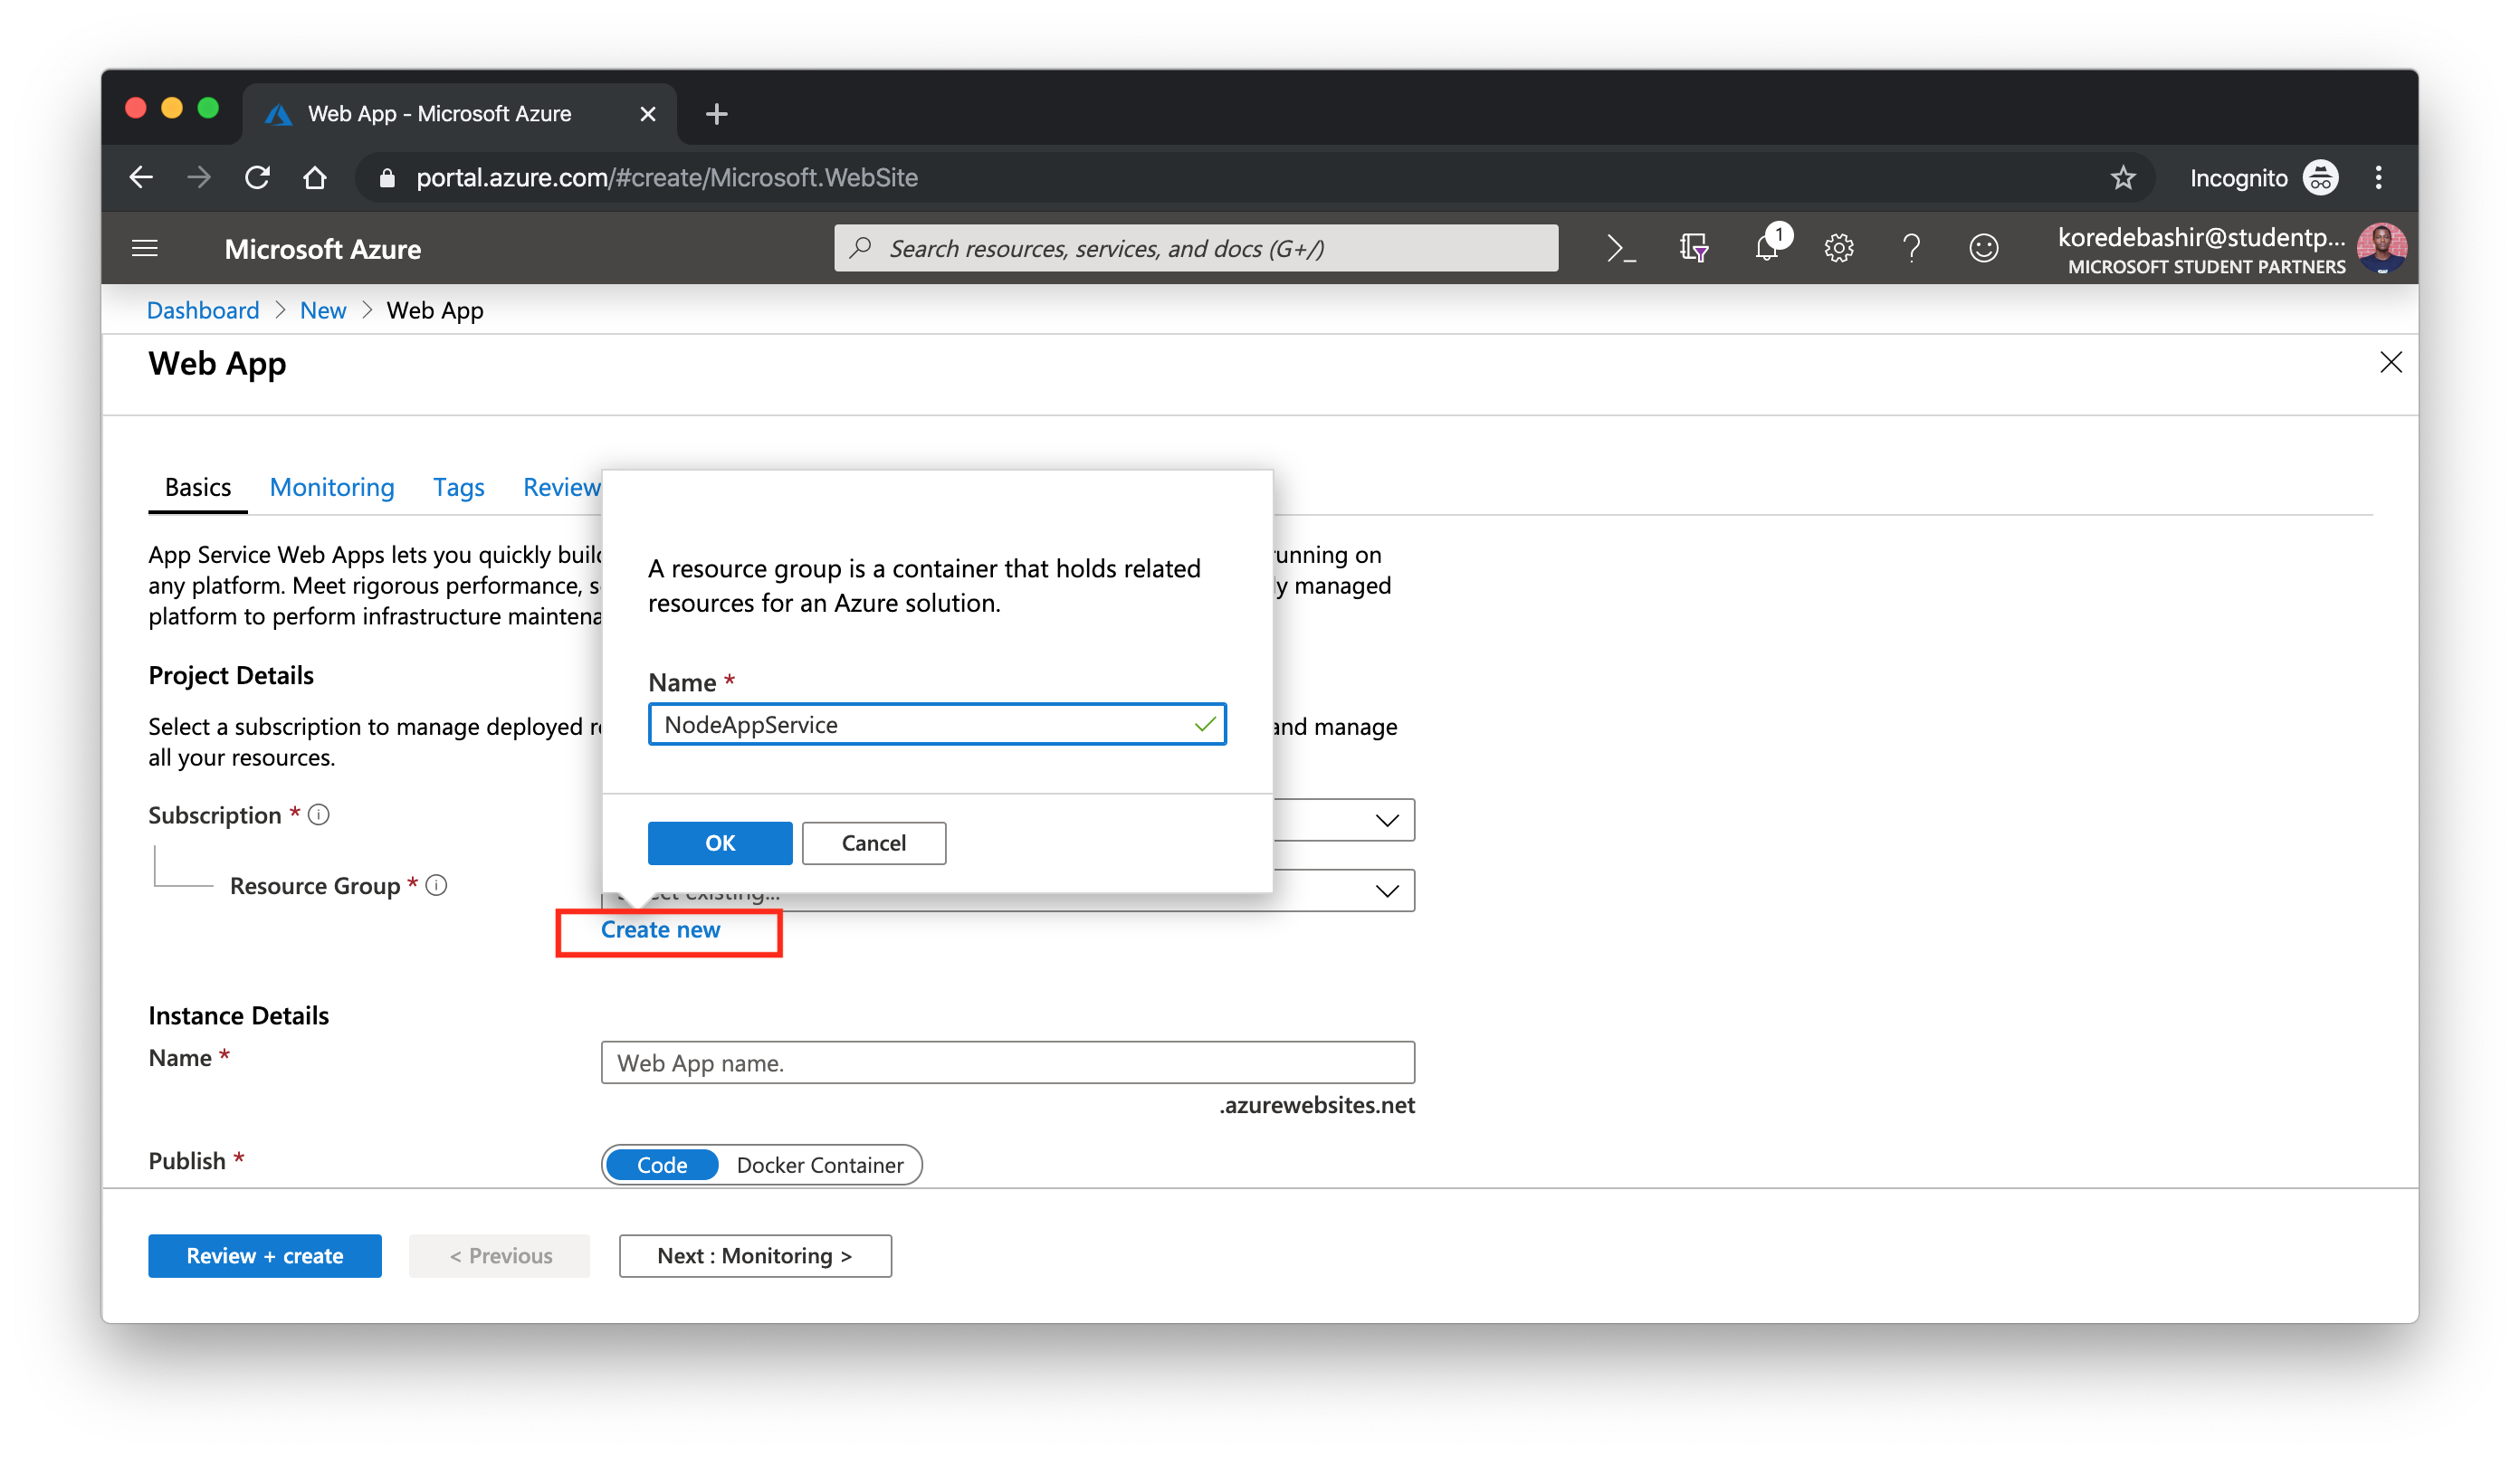 <figcaption>Click on “Create new” to create a new resource group</figcaption>
OS: The Operating System the runtime stack would be installed on. I used Linux for this guide.
Name: This is the URL for the app, as well as the unique name of the app you are creating. The name for the app in this guide is: node101.
Runtime stack: This is the runtime engine that would power your code. We are using the Node runtime engine (version 10.10) for this guide.
 <figcaption>Change the Runtime stack to Node version 10.10</figcaption>
Publishing option: This is the kind of item you want to deploy/publish on your runtime stack (the NodeJS engine). Select the code option, since we would be publishing a written code.
Region: This is the Azure server farm or region where your web app server would be provisioned. Choose the nearest location to your region, if you’re not like me (living in Nigeria) - else, select the “Central US” option.
App service plan: This is where you select the storage size, Memory and Azure Computer Unit (ACU) needed for the performance of your web app.
 <figcaption>Click on “Change size” to select the proper App Service Plan for your app</figcaption>
 <figcaption>Select “Dev / Test” and click on B1 as shown below</figcaption>
 <figcaption>Select “B1” pricing tier and hit “Apply”</figcaption>
 <figcaption>Click “Review + Create” to review your resource creation</figcaption>
 <figcaption>Review the deets you have provided for your Web App Service before hitting “Create”</figcaption>
Almost immediately, your Web App Service resource will be in the process of deployment. Expect this process to take a long time (based on the strength of your internet connection). You should be presented with the page below, once the App Service deployment is ready.
 <figcaption>Hit “Go to resource”</figcaption>
Hit “Go to resource” as shown above, to reveal your deployed resource. Note: you’ve only just deployed your production environment online, and NOT your source code nor project!
 <figcaption>Dashboard of the deployed Web App Service</figcaption>
The “Go to resource” button should take you to the page shown above. This page has an “Overview” section which displays the information about the App Service that has just been provisioned. By default, the App Service Deployment Center sets the FTP option as the deployment mode. We would be changing this to the required option in the next part of this series, stay tuned.
We. Are. Here!
We’ve come to the end of this part of our guide on deploying NodeJS applications on Azure App Service.
In this part, I did scratch the surface of the Azure App Service offering, as a part of the goals for this crash course is to make this guide comprehensive enough to be easily understood. The second/last part of this guide can be found here. Cheers :blush: